01 · Getting started
Installation and the TMS menu
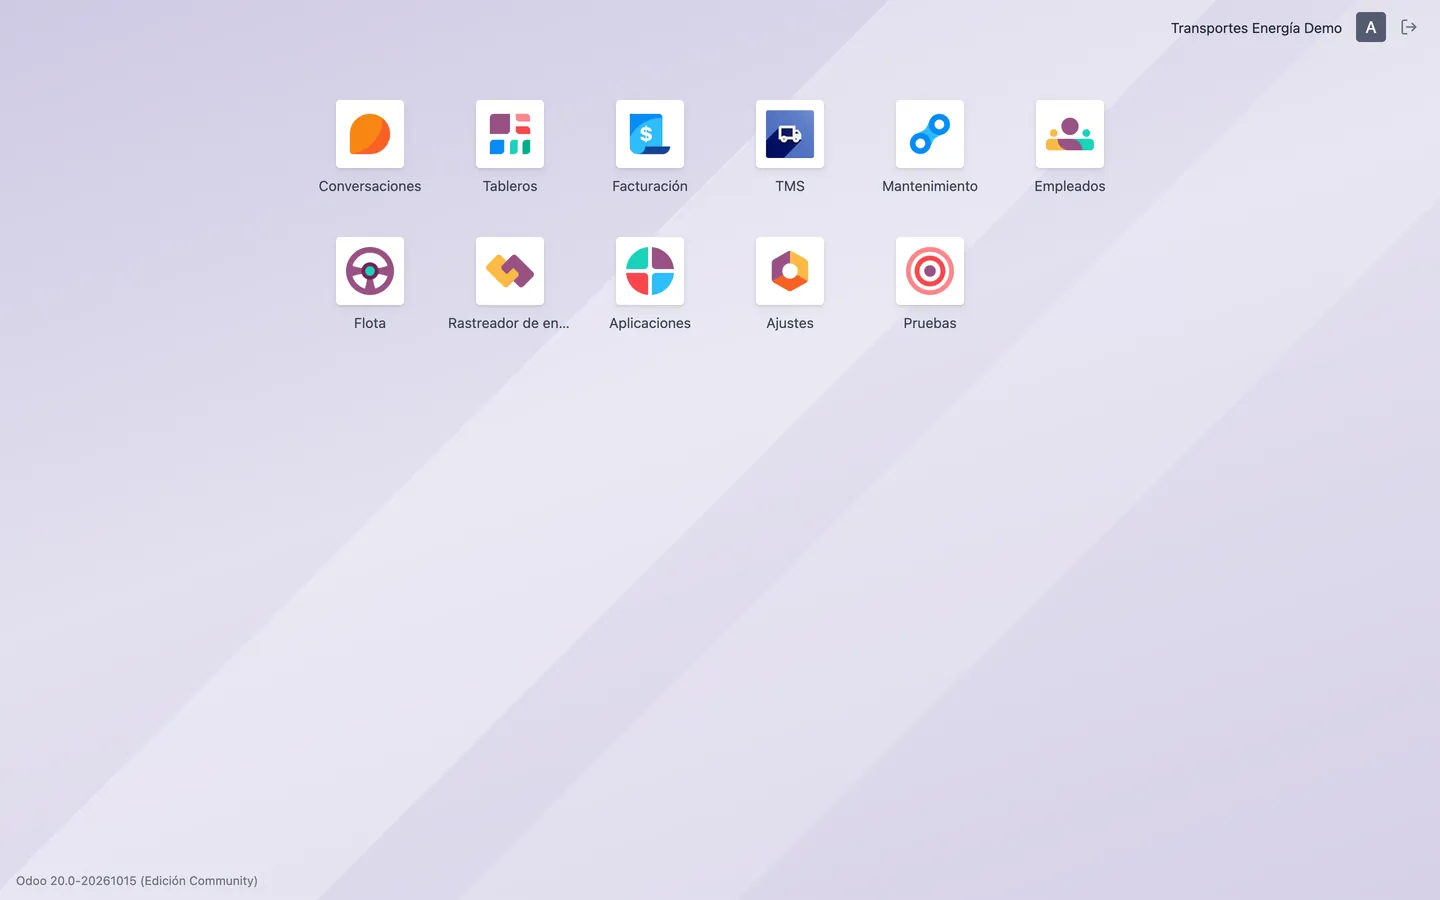
base_tms_energy adds the TMS app to Odoo. It builds on the standard Accounting, Fleet, Maintenance, Employees, Sales, Products and Discuss apps, which are installed automatically as dependencies.
- 1Copy the base_tms_energy folder into the addons path of your Odoo 20 (the server needs the openpyxl Python library, already included in the official Odoo image).
- 2In Apps, click «Update Apps List», search for «TMS Energy» and install it.
- 3Open the TMS app: its menu has Home (requests, import, checklists and km sheets), Data (routes, price lists, vehicles and sets), Employees, Fuel, Agenda, Records, Views (GPS map) and Maintenance.
02 · Master data
Routes
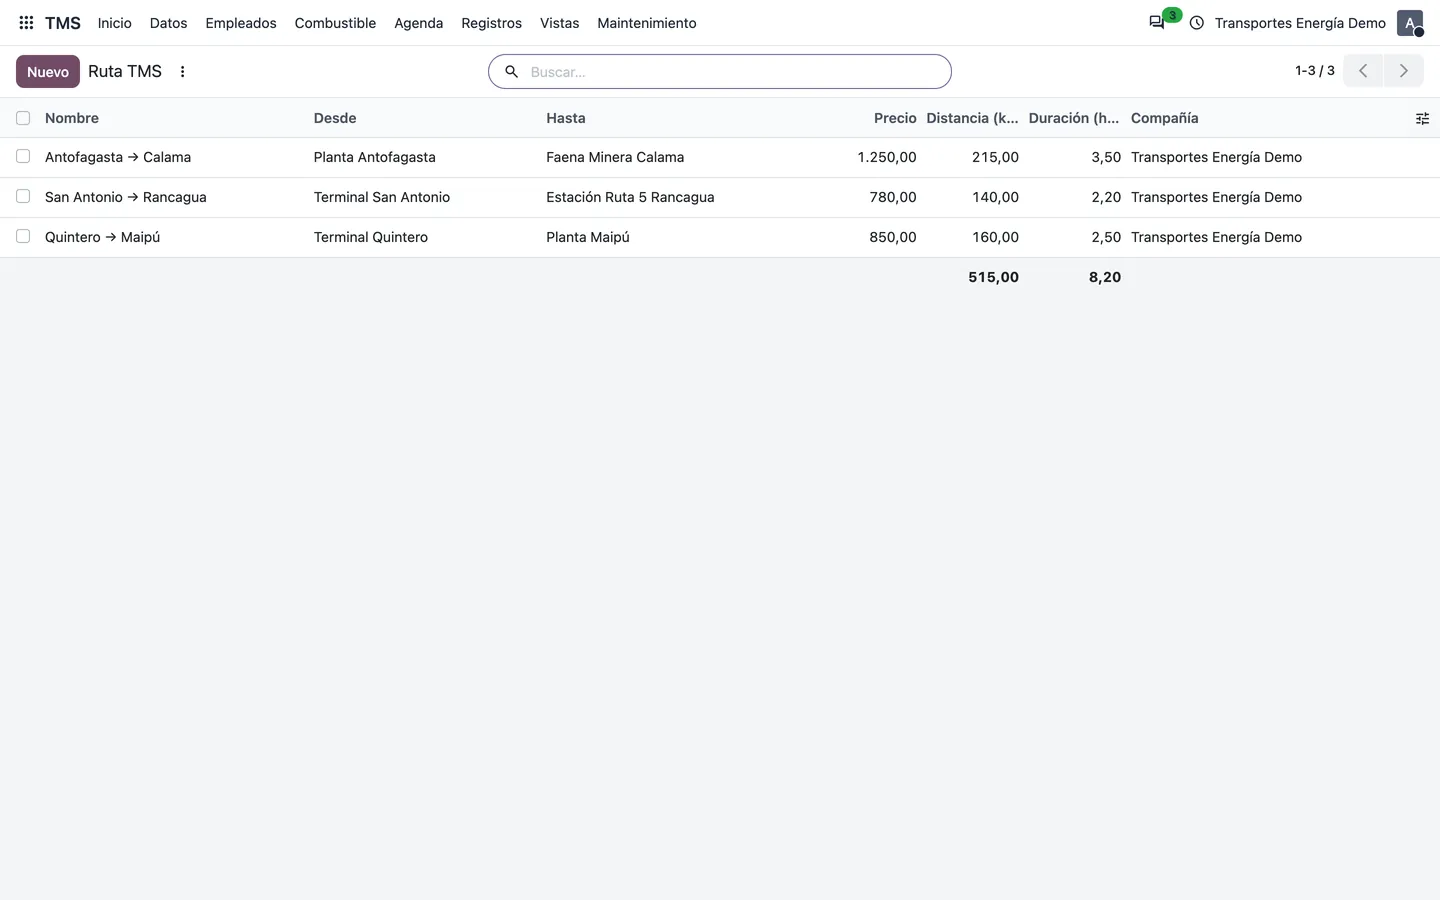
A route links an origin and a destination (Odoo contacts: terminals, plants, stations) with its distance, duration and base price. Every transport request starts from a route.
- 1Go to TMS → Data → Routes and click «New».
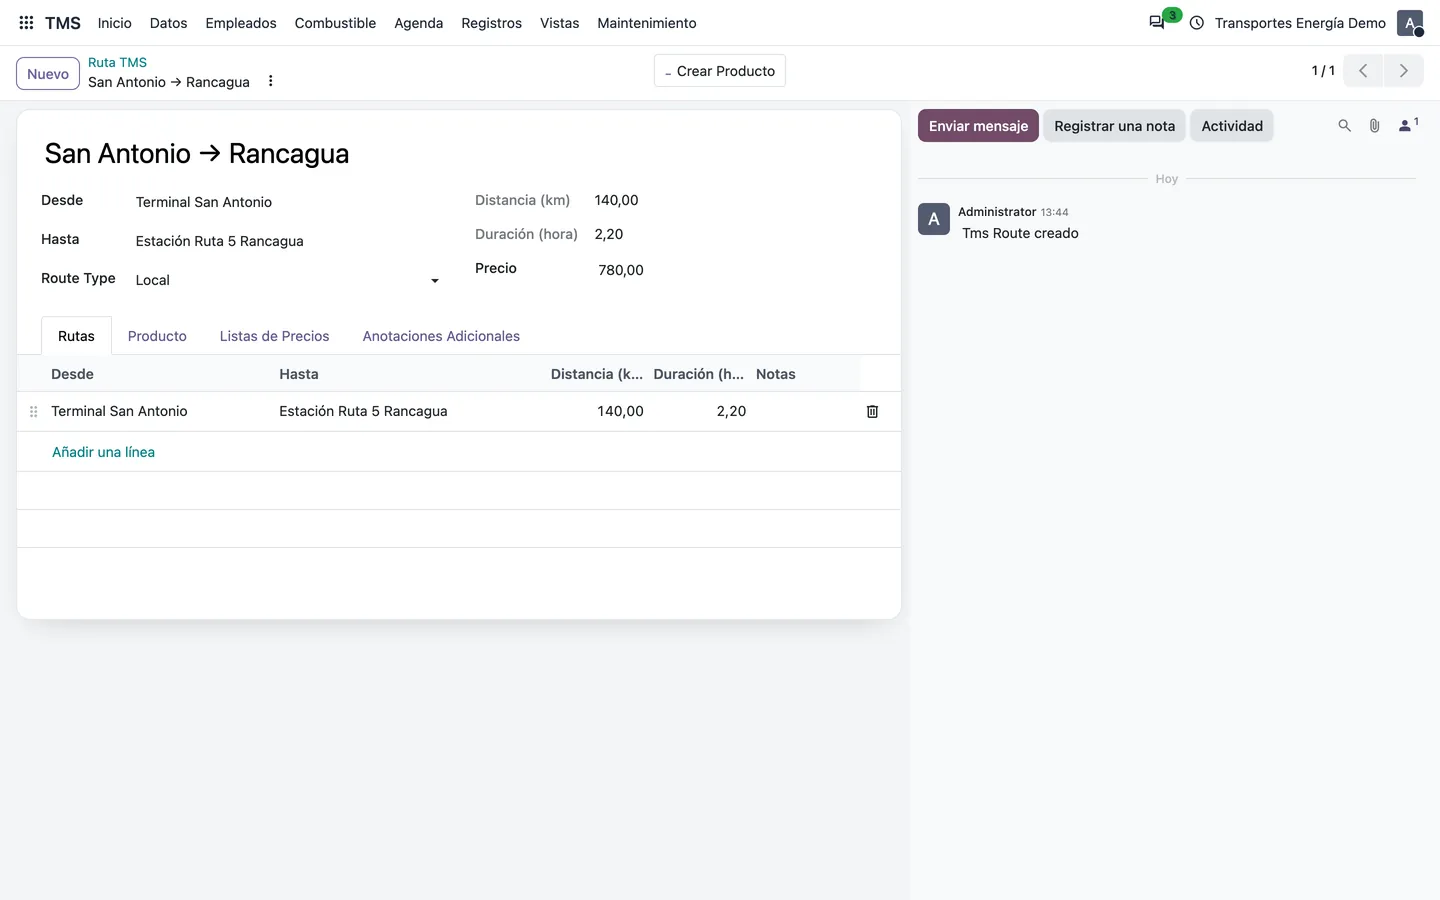
- 2Enter the name, the origin («From») and destination («To»), the distance in km, the duration in hours and the price.
- 3Choose the type: Local or Long distance. If the route has several legs, add them as lines, each with its origin, destination, distance and duration.
- 4Click «Create product» to generate a service product linked to the route: you can then sell it on sales orders and create the requests from them.
03 · Master data
Price lists per customer
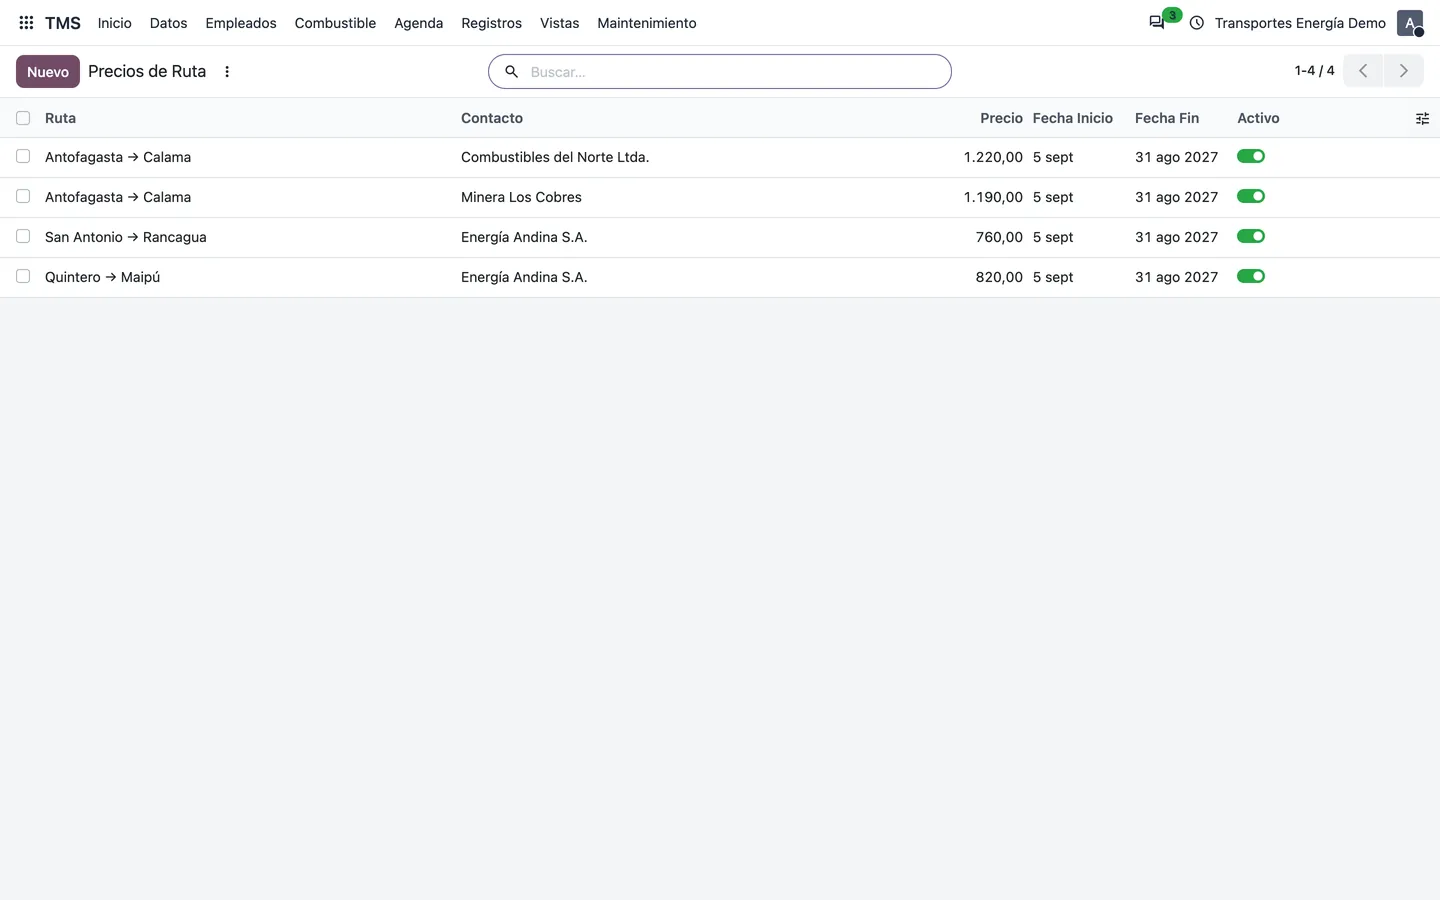
Each customer can have its own price for a route, with validity dates. The price cannot be negative and the end date must be after the start date.
- 1Go to TMS → Data → Route price lists and click «New».
- 2Choose the route, the customer and the price, and optionally the start and end dates.
- 3The name is built automatically: «Route - Customer ($price)».
04 · Fleet
Vehicles and models
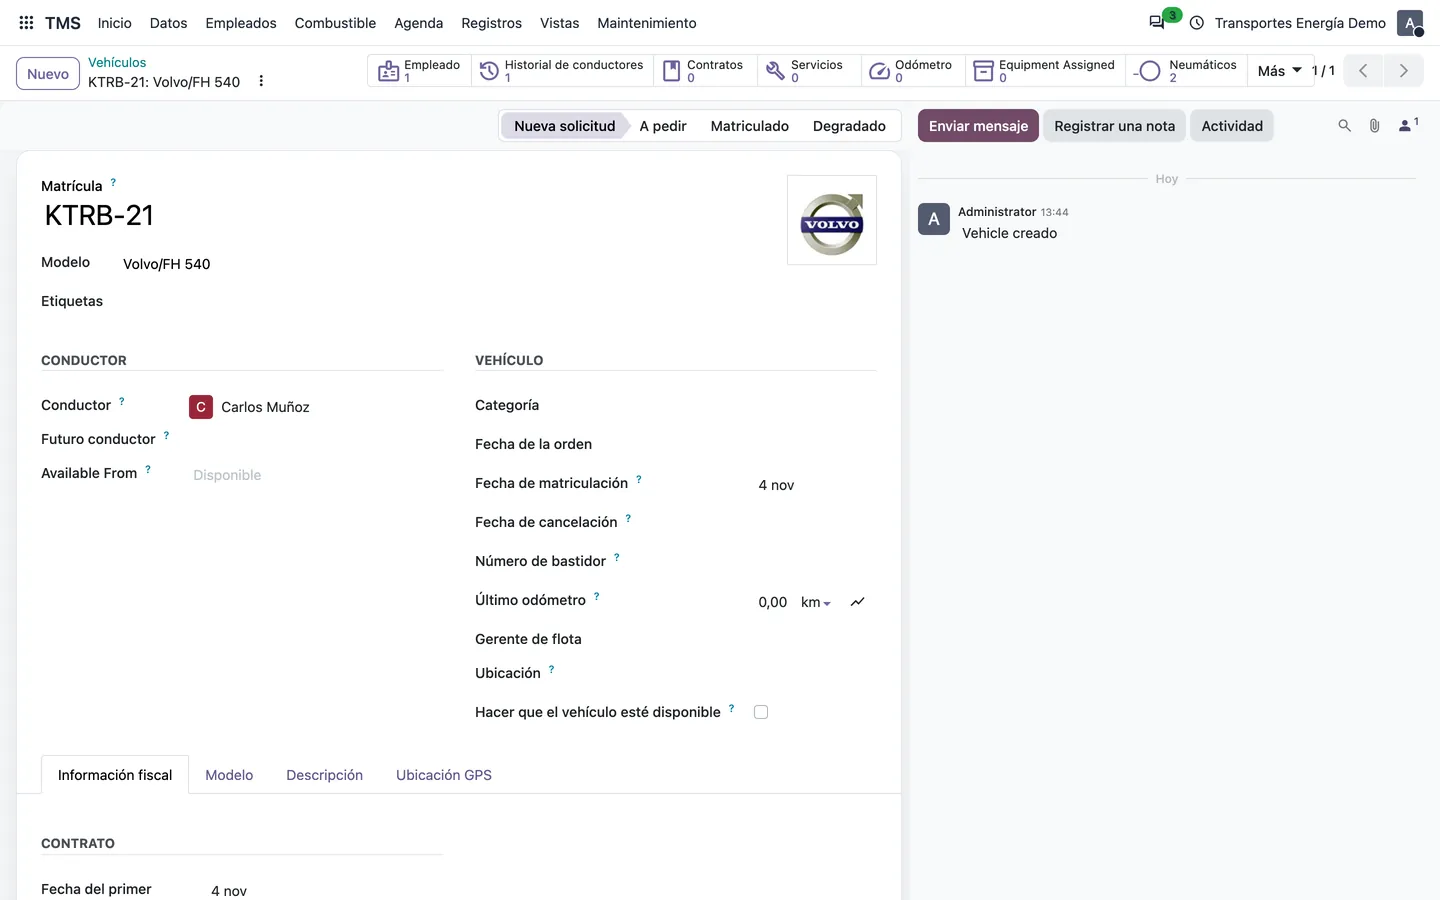
The module extends Fleet vehicles with the data an energy carrier needs and adds shortcuts to their tyres, maintenance orders and fuel fills.
- 1On the vehicle (TMS → Data → Vehicles), «Tax info» tab: engine number, insurance company and policy number, whether it has a ladder, and load capacity in kg and m³.
- 2«GPS location» tab: latitude, longitude, date and notes of the last position, and the transport request in progress.
- 3The header buttons show how many tyre changes, maintenance orders and fuel fills it has, and open them.
- 4The vehicle model gets the engine displacement, height, length and width, the fuel and AdBlue tank capacities, the cabin type (cab-over or bonneted), the beds and the total weight.
05 · Fleet
Tractor + trailer sets
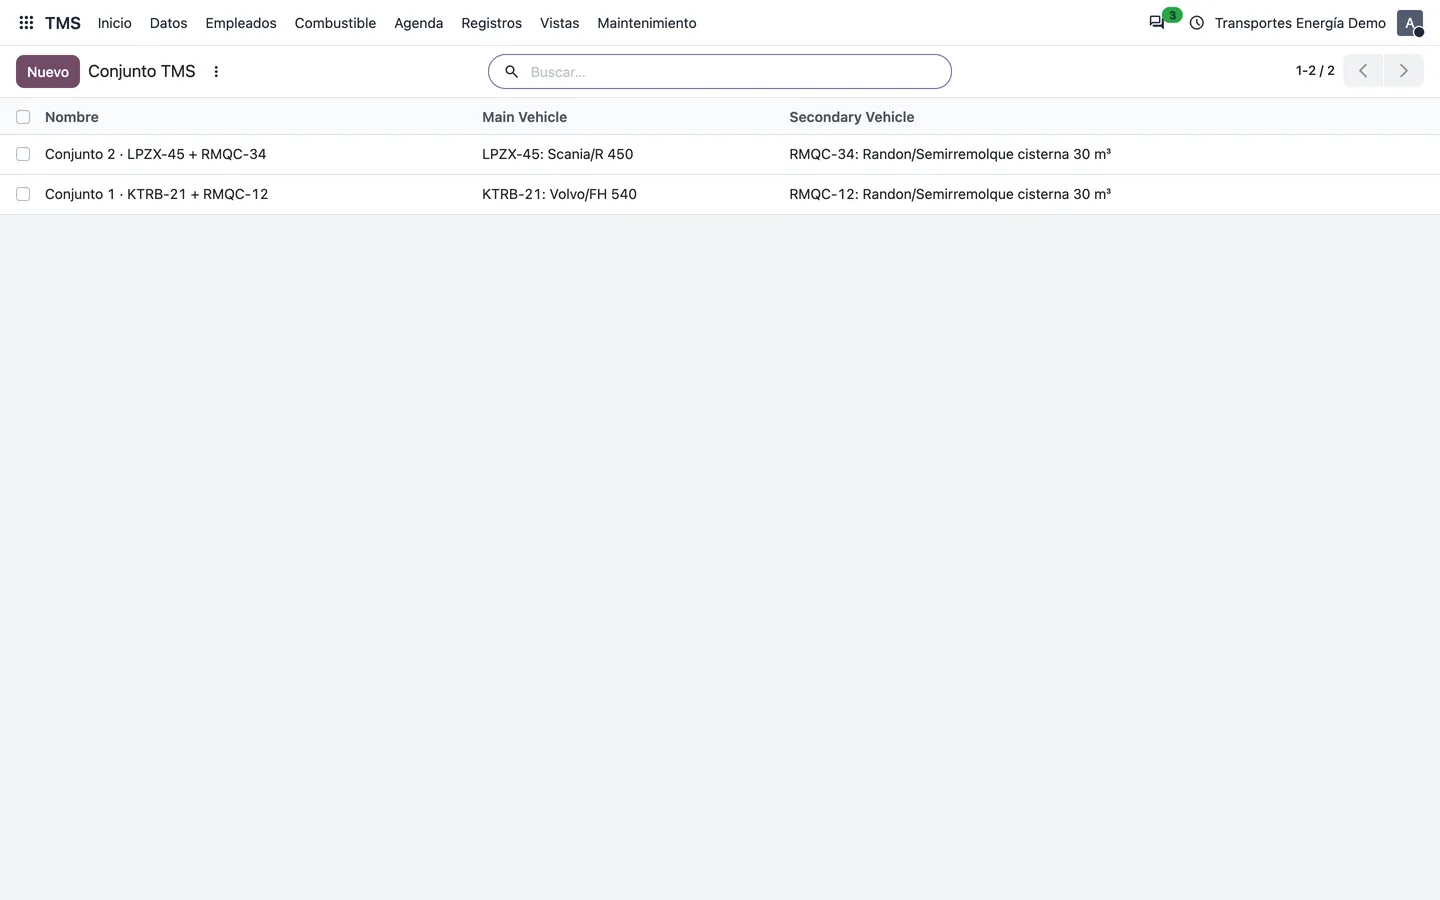
A set groups the main vehicle (tractor) and the secondary one (semi-trailer or tanker) that travel together. On the request you choose the set, so it is clear which equipment does each trip.
- 1Go to TMS → Data → Sets and click «New».
- 2Enter a name, choose the main and the secondary vehicle and save.
06 · Operations
Transport requests
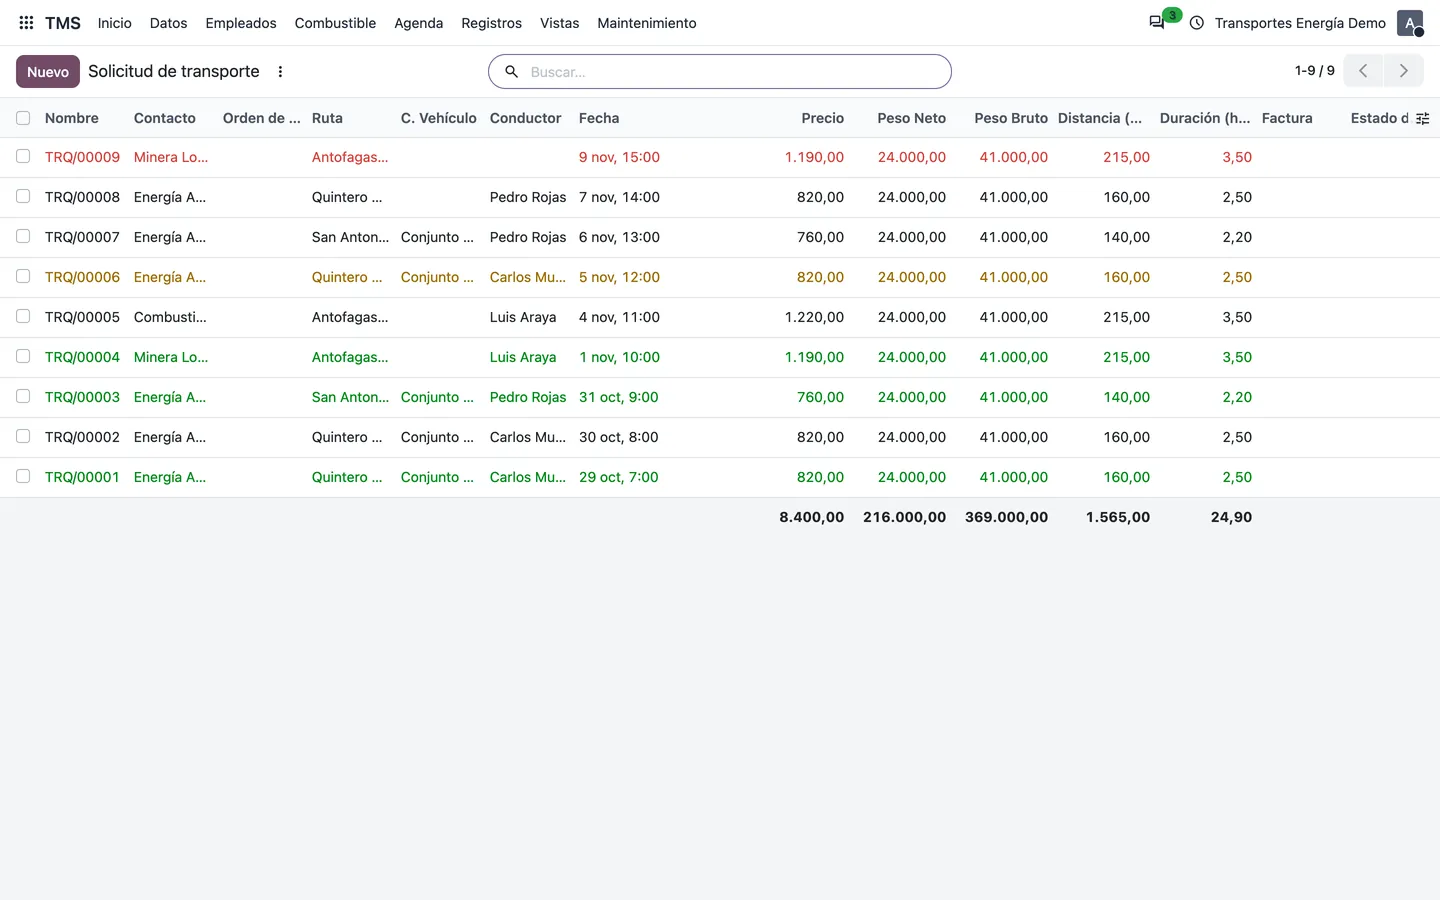
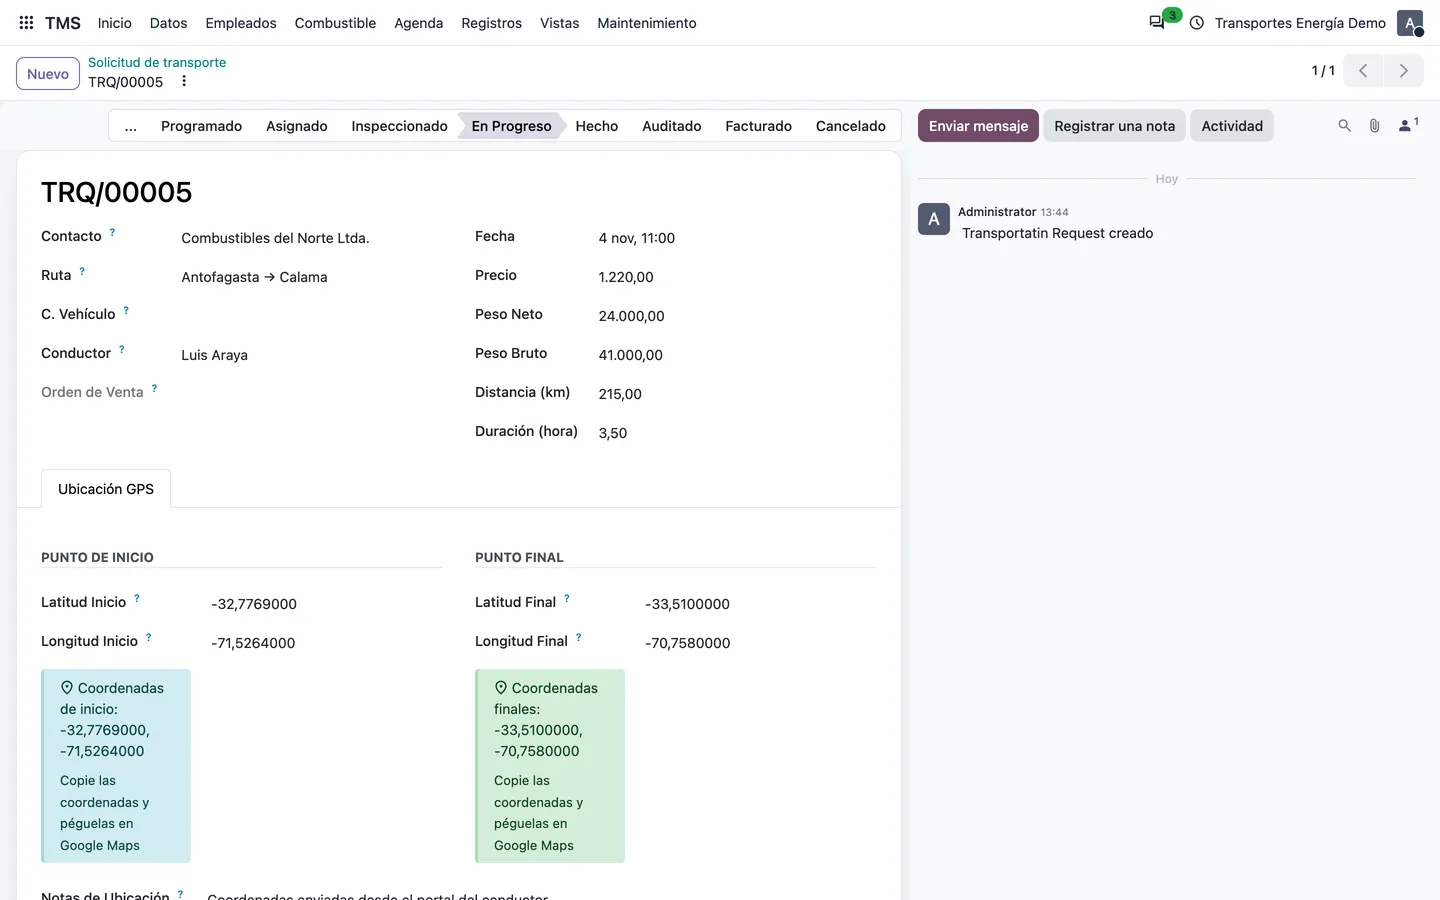
The request is the heart of the module: a trip for a customer along a route, with its set, vehicle, driver, weights, price and start and end coordinates.
- 1Go to TMS → Home → Transport request and click «New». The number (TRQ/00001…) is assigned automatically.
- 2Choose the customer (contact) and the route: the distance, duration and price are filled in. Add the set, vehicle, driver, a co-driver if any, the date and the net and gross weights.
- 3Move the request through the status bar: Draft → Confirmed → Programmed → Assigned → Inspected → In progress → Done → Audited → Invoiced (or Cancelled).
- 4In the «GPS location» tab record the start and end coordinates; the form shows them ready to paste into Google Maps.
- 5To invoice, select requests in Done or Audited state in the list and use the «Create Invoices» action: one invoice per customer is created, with a line per trip. A request that is already invoiced is never invoiced twice.
Tip: From a sales order with route products, the «Crear solicitudes de transporte» (create transport requests) button creates one request per unit of each line (without duplicates if you click it again). From a route product, the «Crear solicitudes TMS» button opens a wizard that creates several requests at once for a customer, with date and price.
07 · Operations
Import requests from Excel
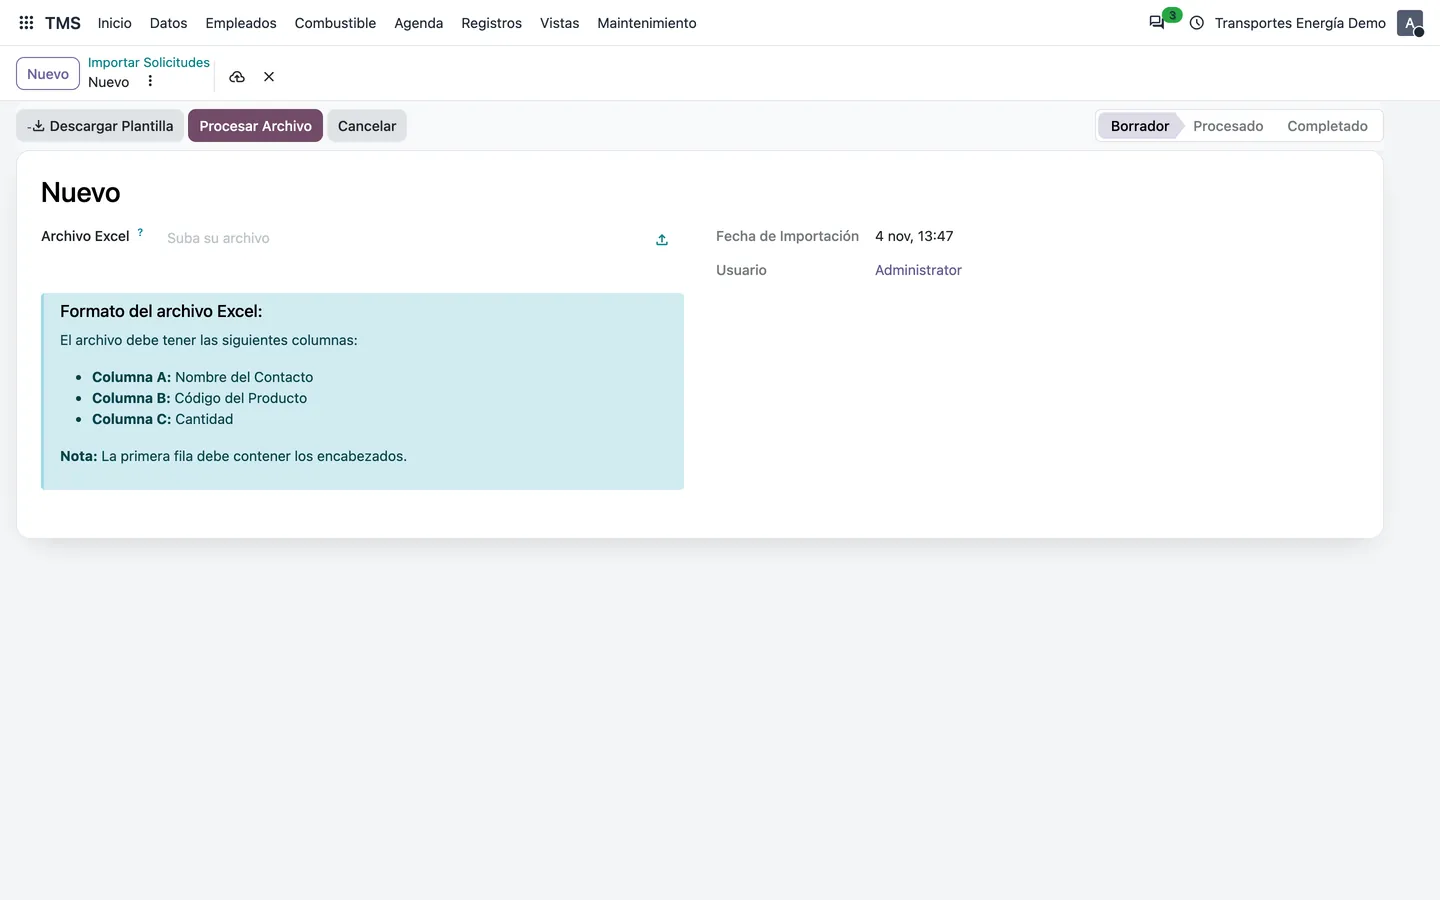
If your customers send their orders in a spreadsheet, the importer creates the requests in bulk and shows you which rows have errors before creating anything.
- 1Go to TMS → Home → Import requests and click «New».
- 2Click «Descargar plantilla» (download template) to get the Excel file with the expected columns: contact, product code and quantity.
- 3Upload the file and click «Procesar archivo» (process file): every row is validated (customer, route product) and marked as valid or with its error message.
- 4Check the valid and error counters and click «Create requests». From the import you can open the requests it created.
08 · Operations
Vehicle checklists
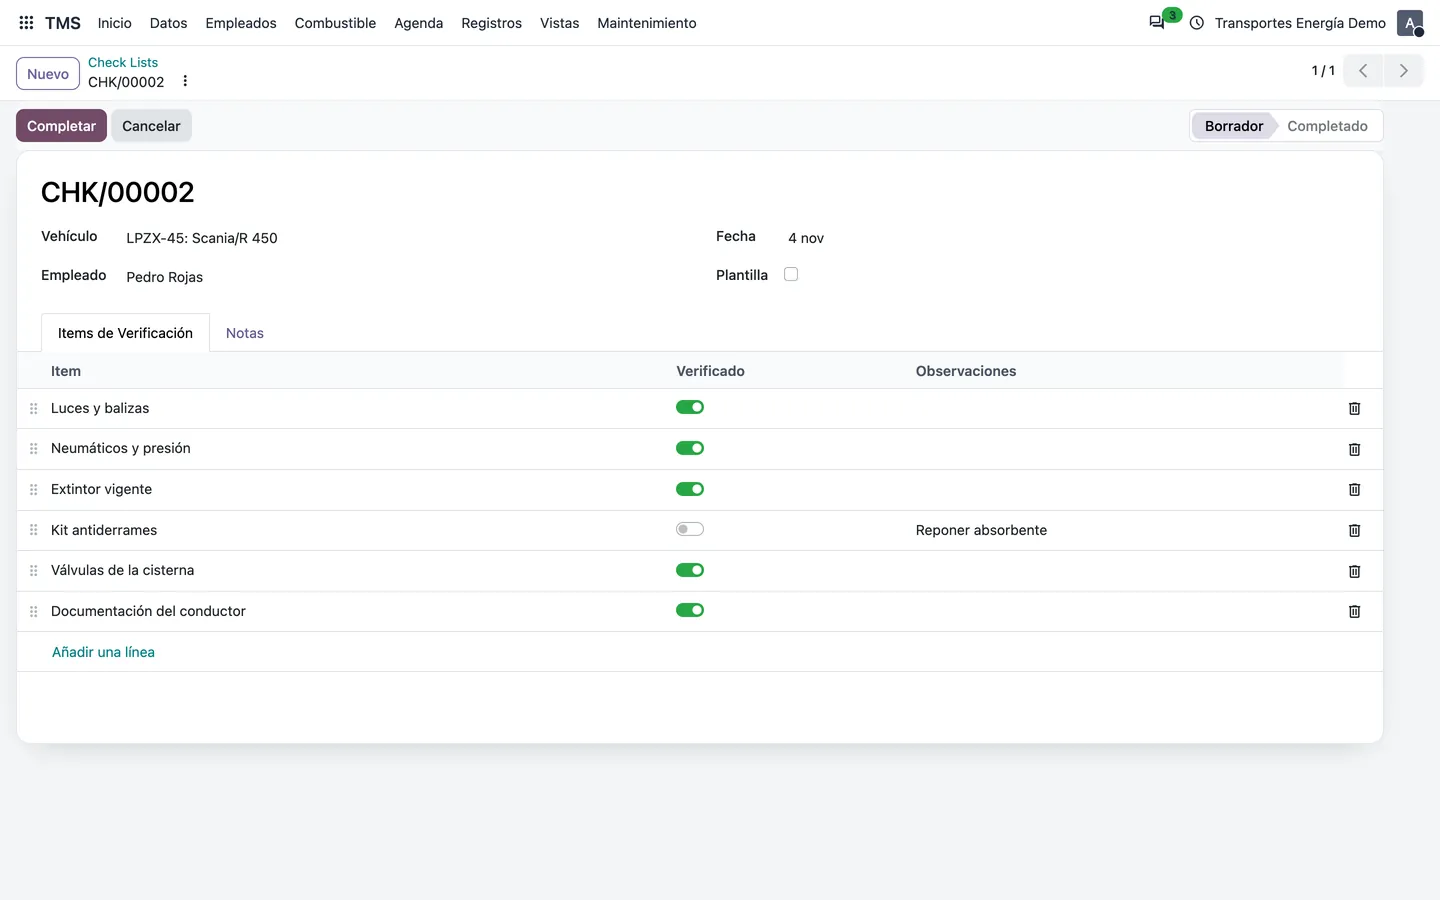
Before leaving, the driver checks the vehicle item by item. Templates avoid typing the same items every time.
- 1Create a list marked as «Template» with the usual items (lights, tyres, extinguisher, spill kit, valves, documents…).
- 2For every inspection create a list with the date, vehicle and driver; tick each item as checked and add observations.
- 3Click «Complete» when done; you can set it back to draft or cancel it.
09 · Operations
Kilometre sheet
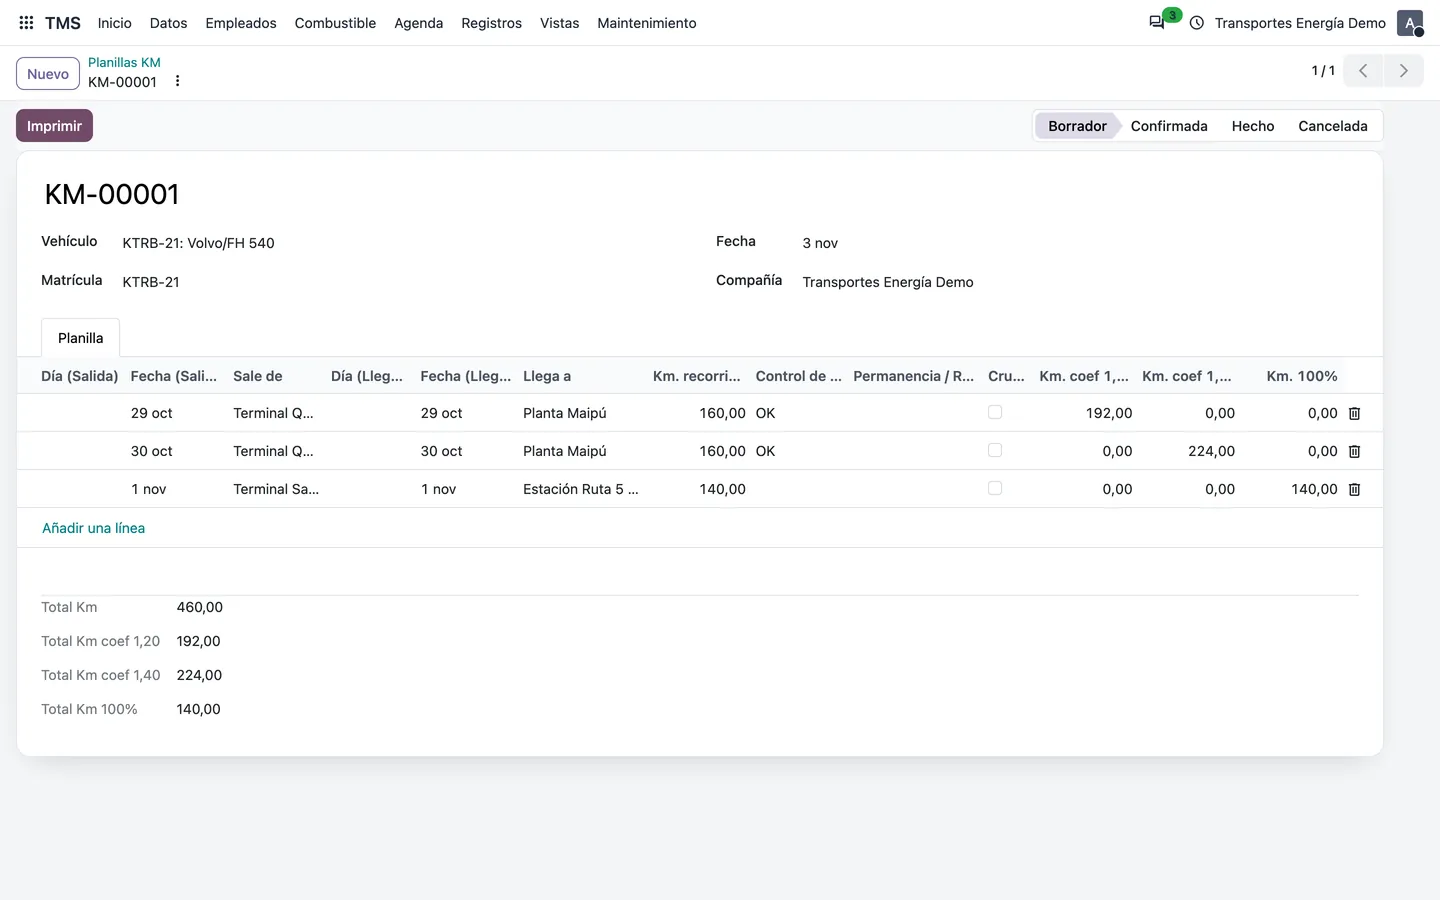
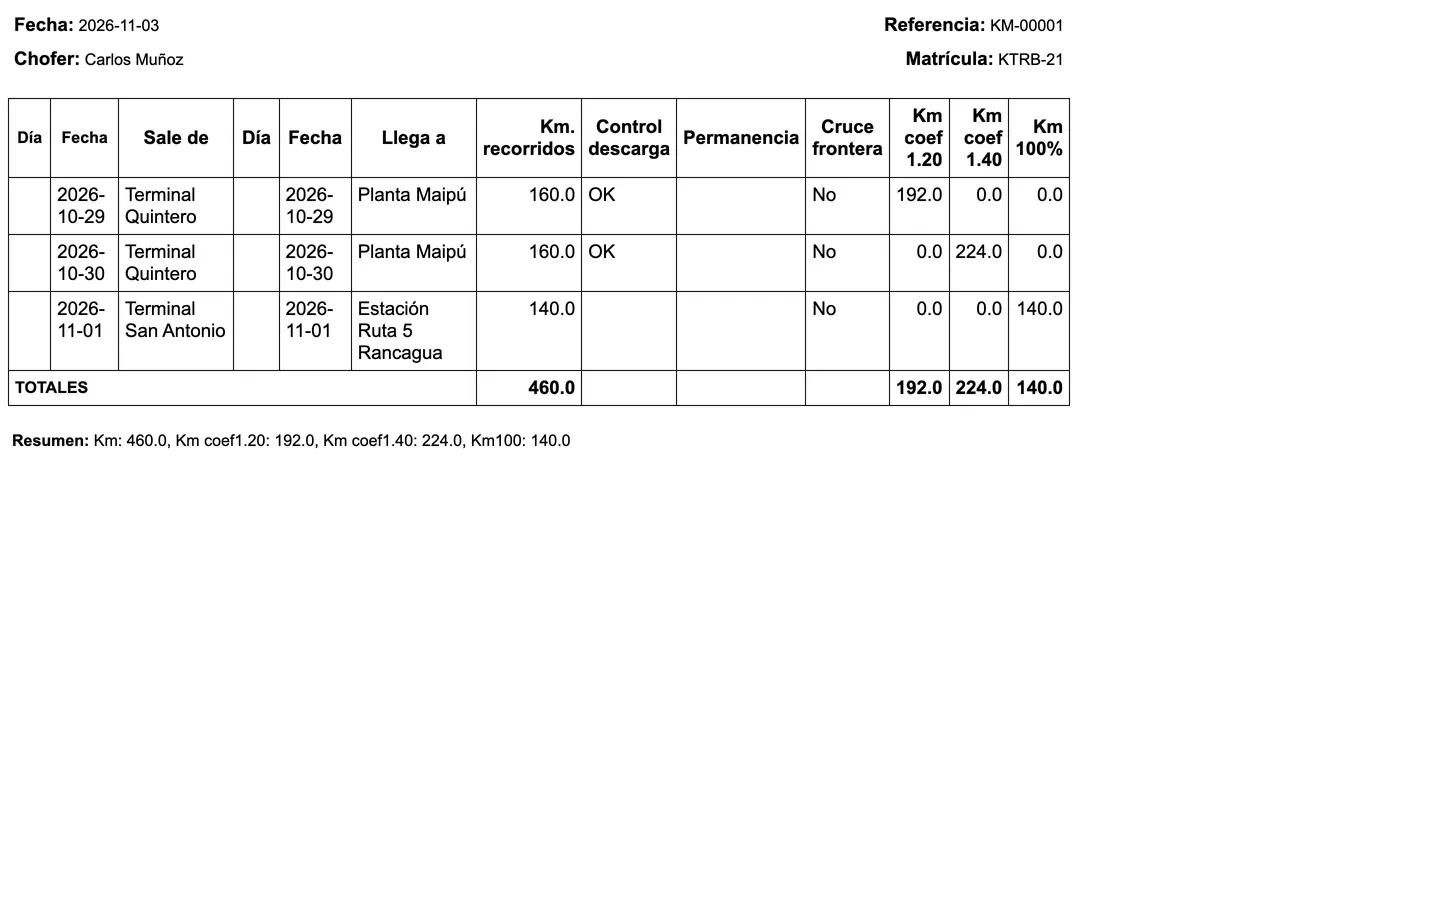
The sheet collects the trips of a driver and a vehicle with the kilometres per coefficient (1.20, 1.40 and 100 %), useful for settlements and agreements.
- 1Go to TMS → Home → KM sheet and click «New»: choose date, driver, vehicle and plate.
- 2Add a line per trip: departure date and place, arrival date and place, kilometres driven, unloading check, stay and whether it crosses a border.
- 3Split the kilometres at the 1.20 and 1.40 coefficients: the 100 % ones are computed automatically (driven − 1.20 − 1.40). The header adds up the totals.
- 4Click «Print» to get the sheet as a PDF.
10 · Fleet
Fuel register
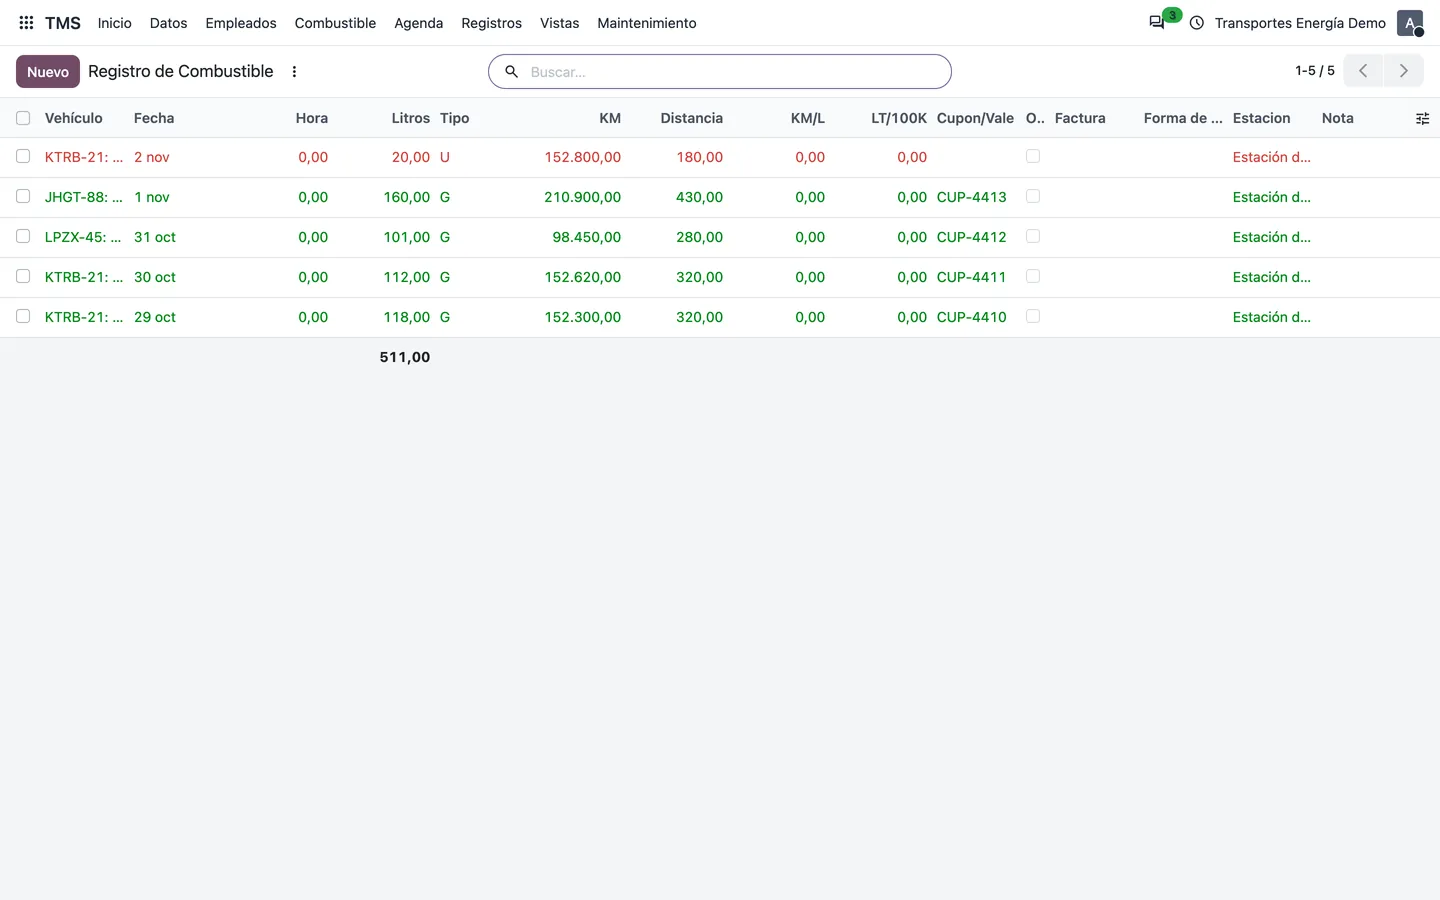
Every diesel (G) or urea/AdBlue (U) fill is recorded with its cost and the vehicle efficiency, to spot unusual consumption.
- 1Go to TMS → Fuel → Fuel register and click «New».
- 2Enter vehicle, driver, date and time, type (G or U), litres, odometer kilometres and distance since the previous fill, whether the tank was filled, the coupon, the station and the price per litre.
- 3The record computes the cost, km/l and litres per 100 km. You can attach the receipt and link the supplier invoice.
- 4Use the «Marcar OK» action to flag the records you validate as reviewed.
11 · Maintenance
Tyre control
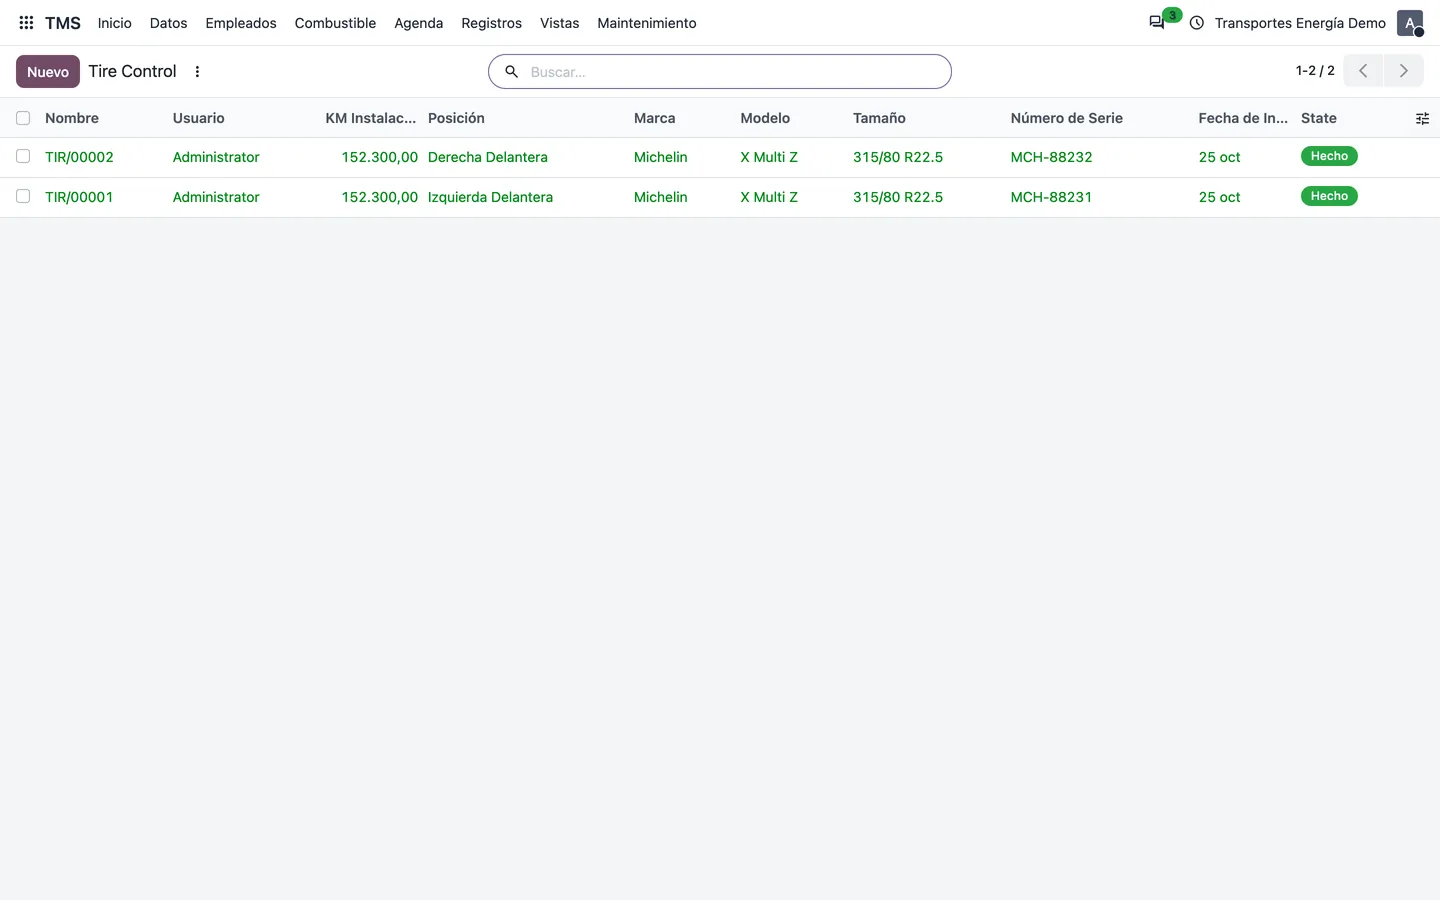
Record every tyre change with its position and the vehicle kilometres, to know how long each tyre lasts.
- 1Go to TMS → Maintenance → Tyre control and click «New».
- 2Choose vehicle, driver, position (front/rear, left/right or spare), installation km, brand, model, size, serial number and date.
- 3From the vehicle, the «Changes» button lists all its tyres.
12 · Maintenance
Maintenance orders
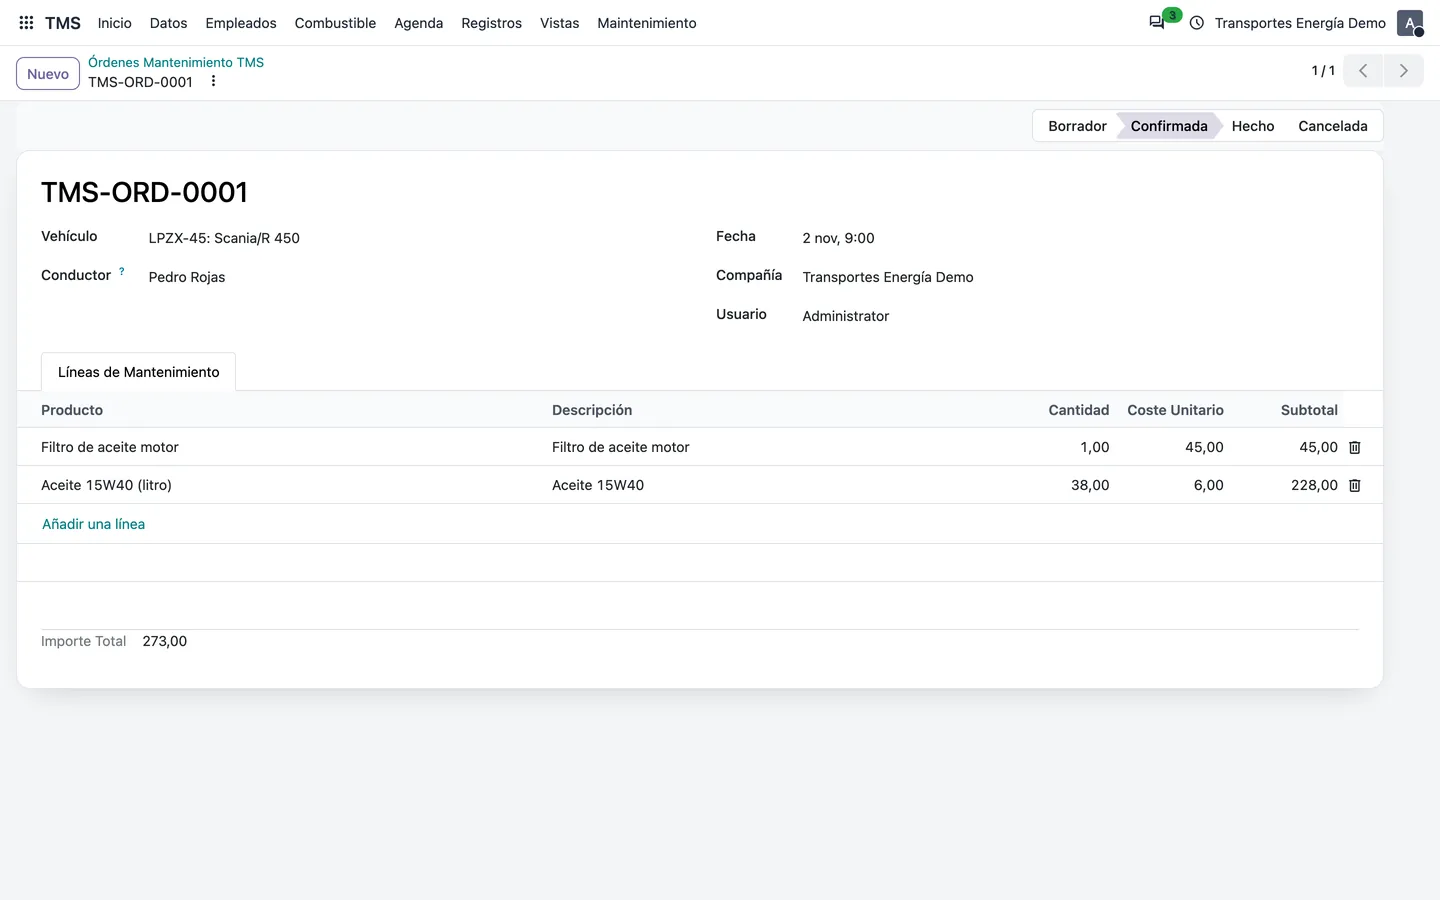
An order gathers the parts and services of a maintenance job with their cost, so you know what each vehicle costs.
- 1Go to TMS → Maintenance → Maintenance orders and click «New».
- 2Choose vehicle, driver and date and add lines with product, description, quantity and unit cost: the total is computed automatically.
- 3Move the order forward: Draft → Confirmed → Done (or Cancelled).
13 · Control
Due-date agenda
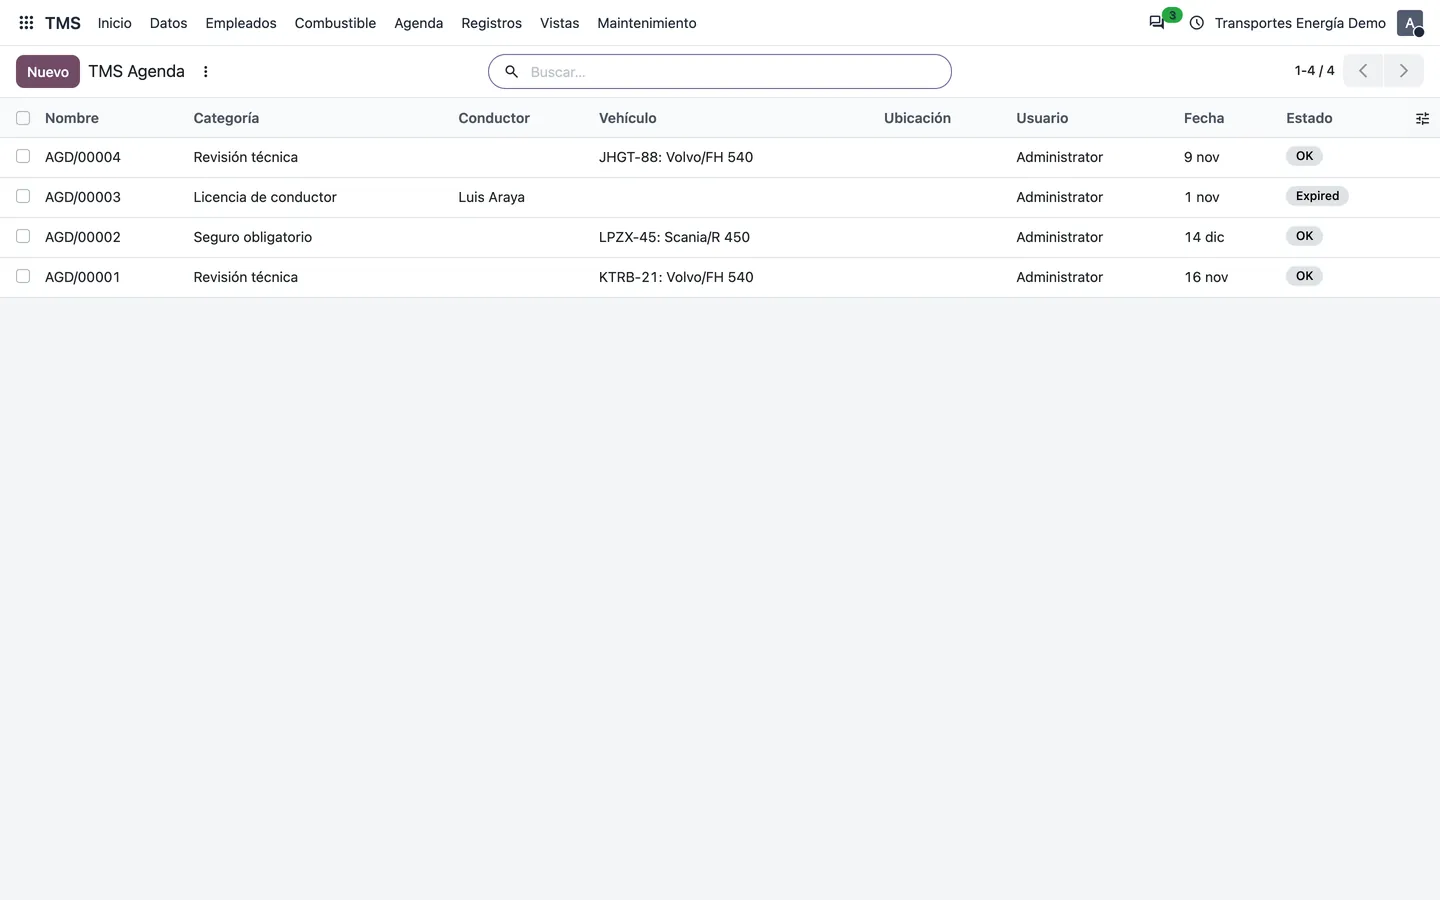
Technical inspections, insurance, permits or licences: every due date goes into the agenda with its category, vehicle or driver. A scheduled task checks it every 8 hours and flags as «Expired» whatever is past.
- 1Create the categories in TMS → Agenda → Categories (for example Technical inspection, Mandatory insurance, Driving licence).
- 2Add each due date in TMS → Agenda with its date, category, vehicle or driver, location and notes.
- 3Filter by status to see what is expired and act in time.
14 · Control
Entry and exit records
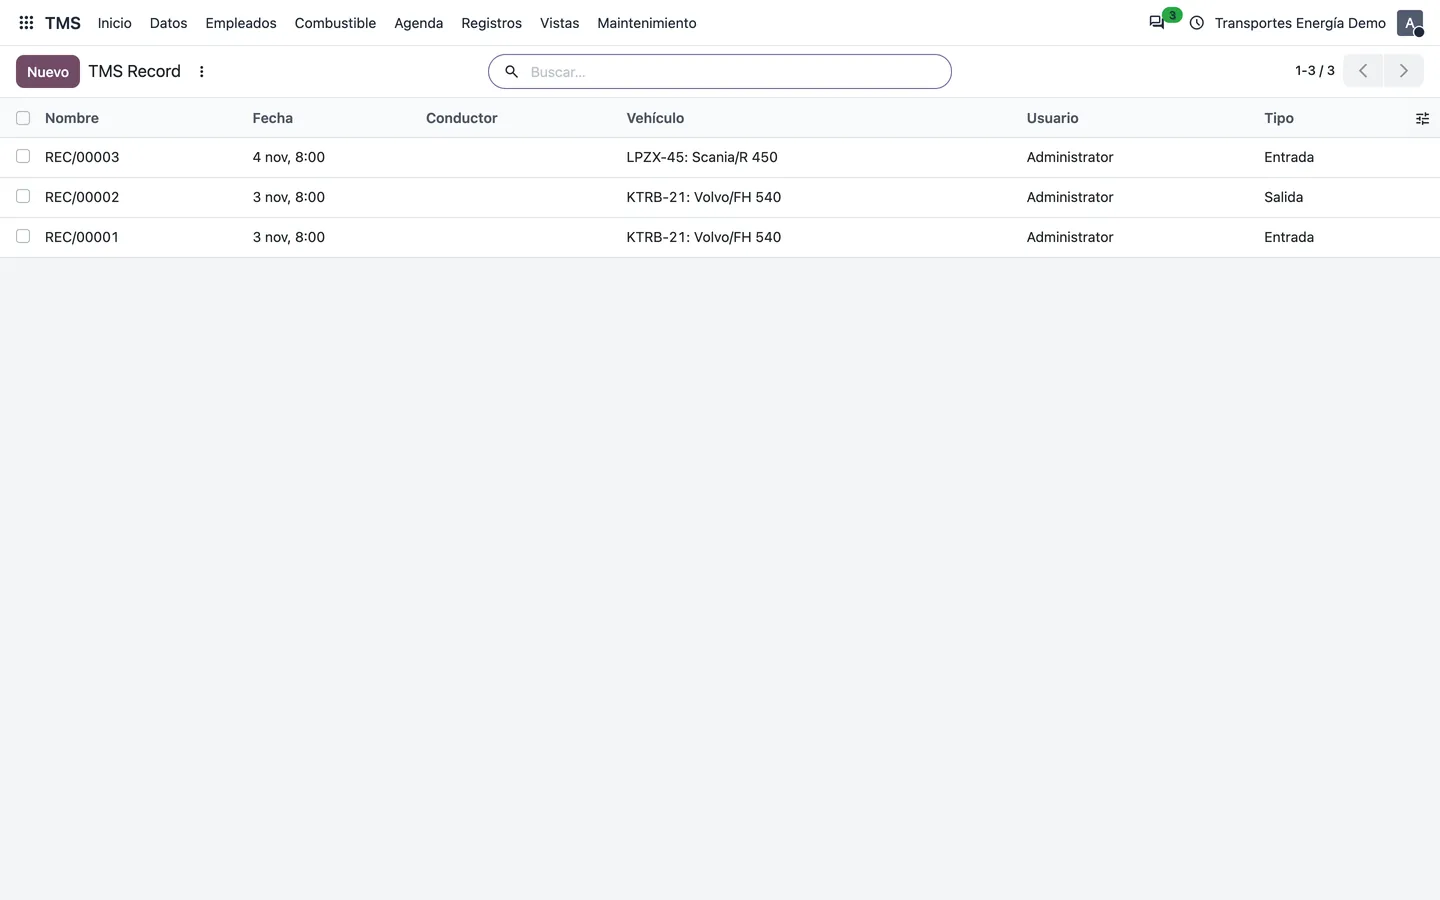
Write down when a vehicle enters or leaves a plant or terminal, with its driver and notes, to trace every movement.
- 1Go to TMS → Records and click «New».
- 2Choose the type (In or Out), date and time, vehicle, driver and category, and add notes.
15 · Fleet
Fleet GPS map
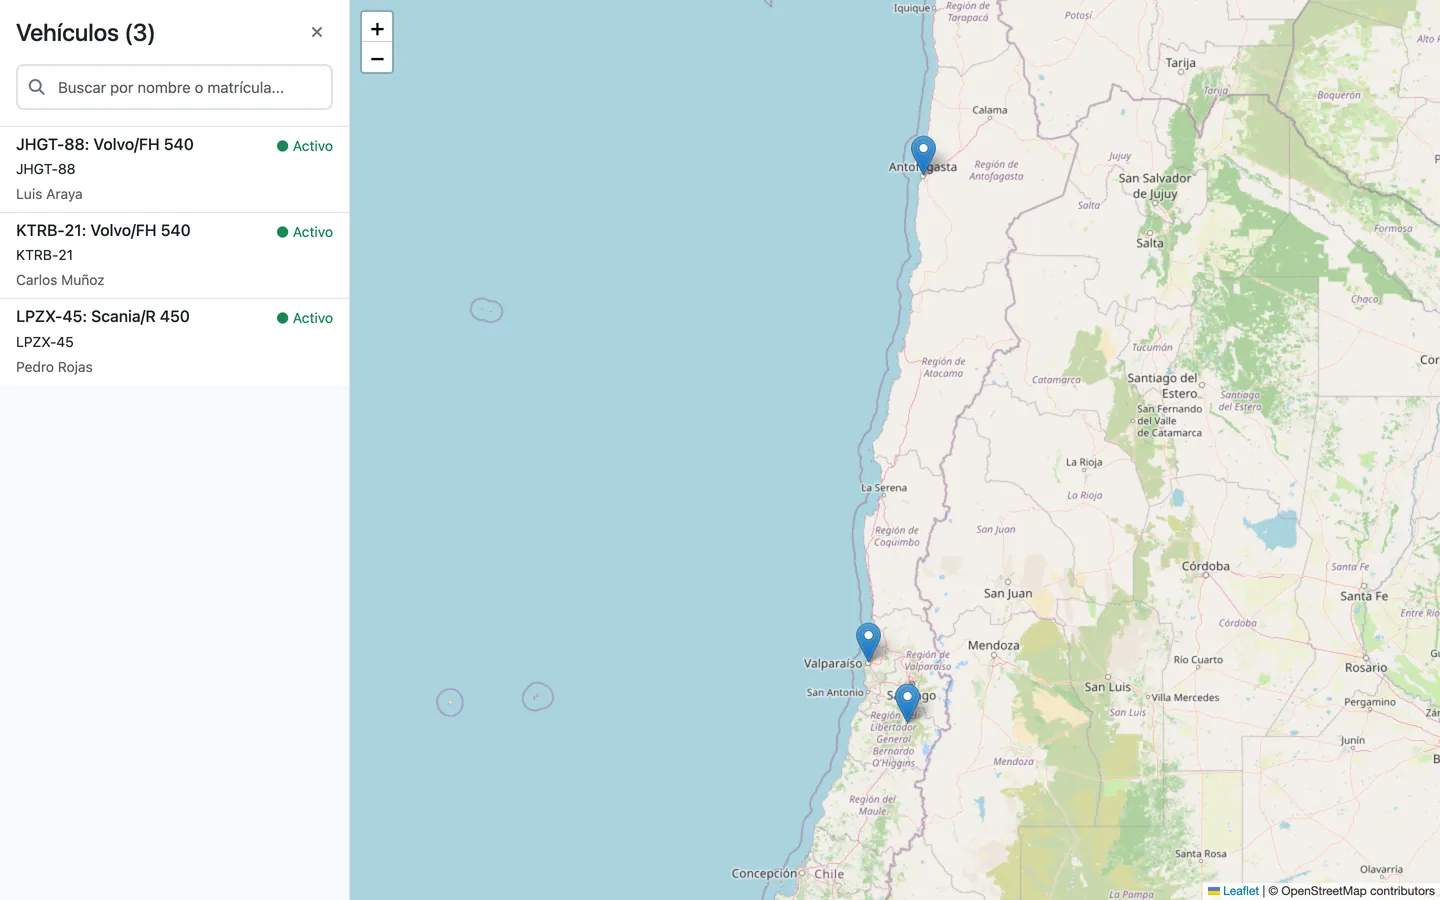
TMS → Views → Map view opens a map (OpenStreetMap) with every vehicle that has a GPS position, its plate, driver and the time of the last position.
- 1Record the latitude and longitude in the «GPS location» tab of each vehicle (or update them from your GPS system through the Odoo API).
- 2Open the map: the list on the left can be filtered by name or plate; clicking a vehicle centres the map on it.
- 3Each vehicle popup links to its record in Odoo.
16 · Drivers
Drivers and portal access
Drivers are Odoo employees. The module adds their cost per kilometre, their payroll configuration and their TMS portal credentials.
- 1Open the employee in TMS → Employees → Employees.
- 2Set their «Cost» (the amount paid per kilometre) and their «Payroll configuration».
- 3In the TMS portal section enter a username and a password, tick «Portal active» and share the /tms/portal address with the driver.
17 · Drivers
Driver portal
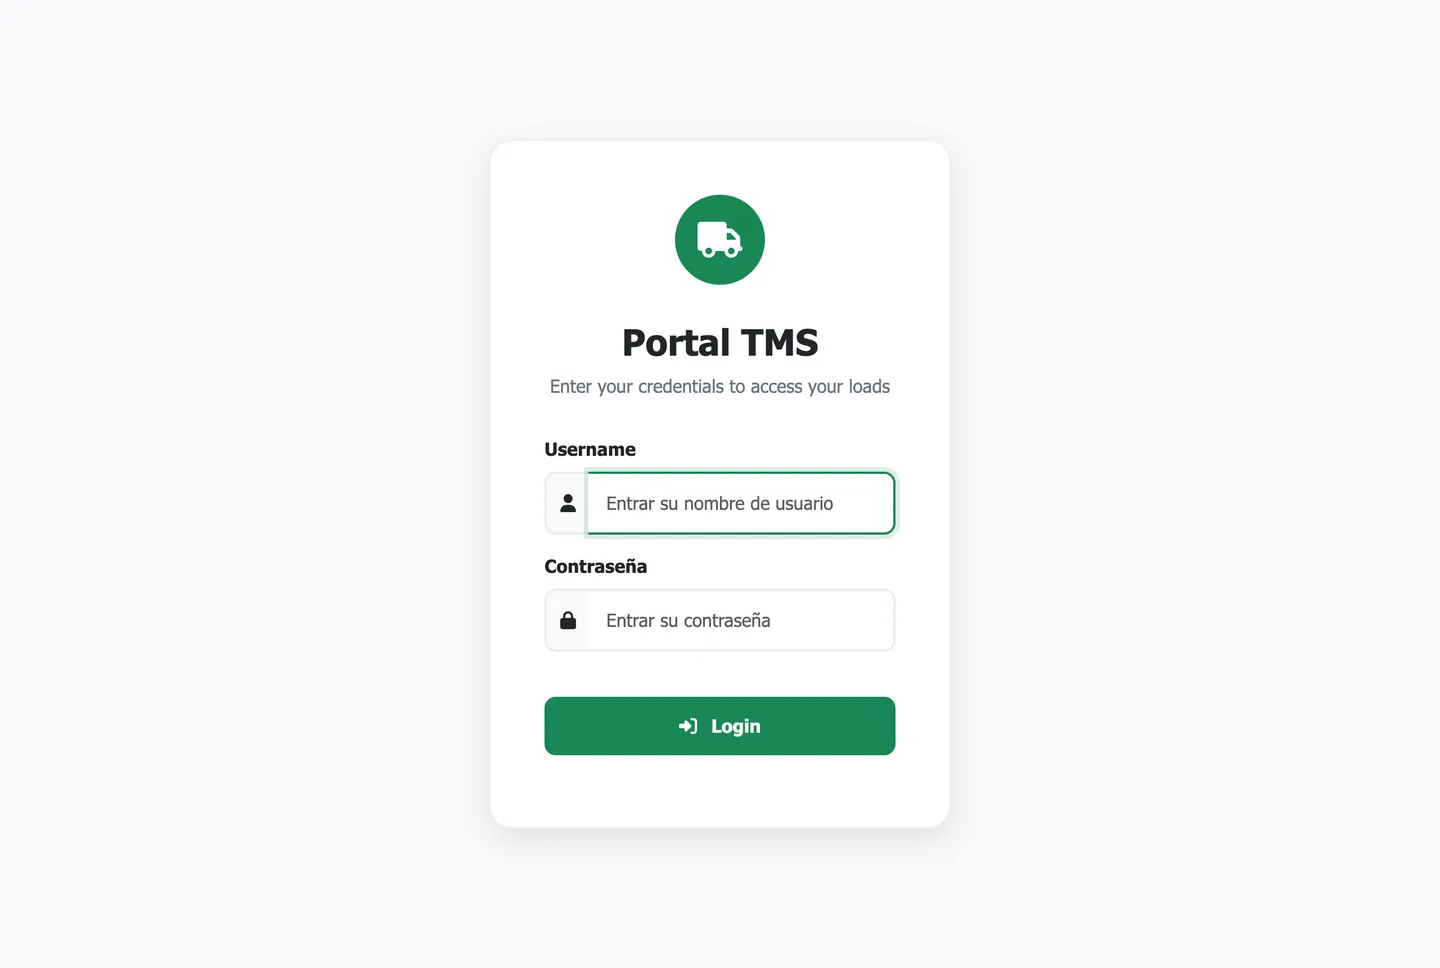
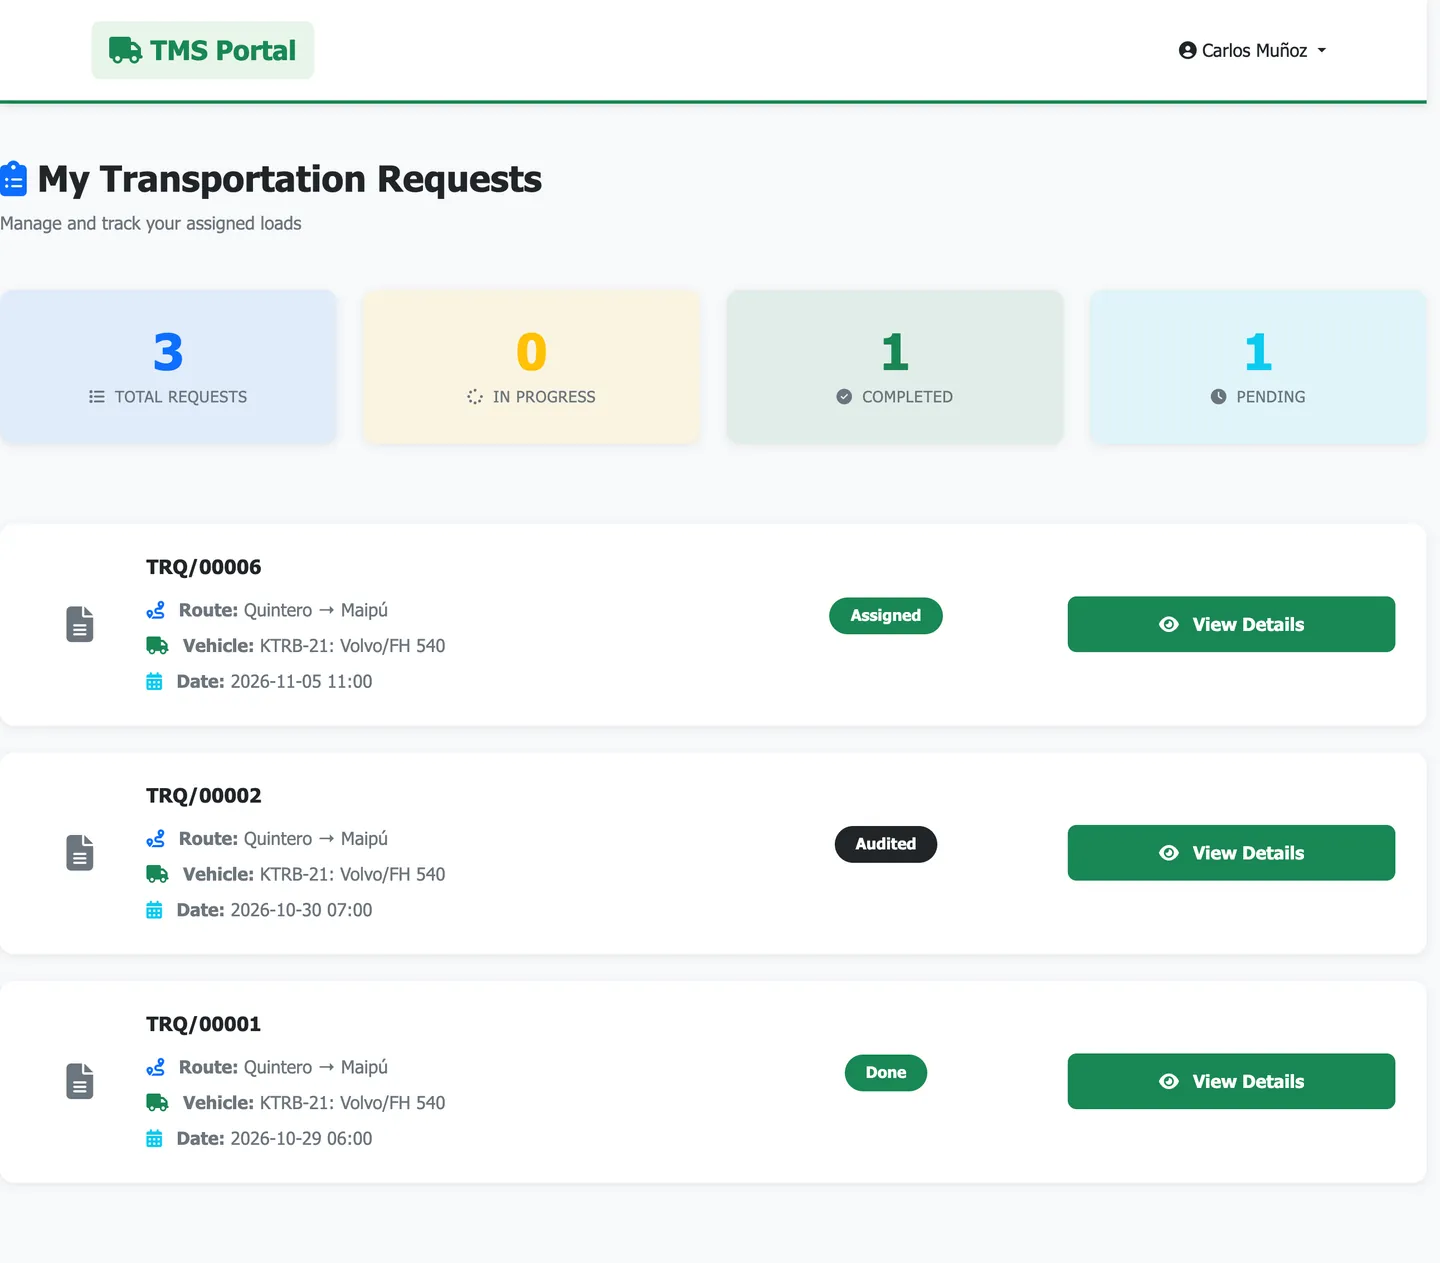
From their phone, drivers see their requests and move them forward without needing an Odoo user.
- 1The driver opens /tms/portal and signs in with their username and password.
- 2They see a summary (total, in progress, completed and pending) and the list of their trips with route, vehicle, date and state; they can filter it.
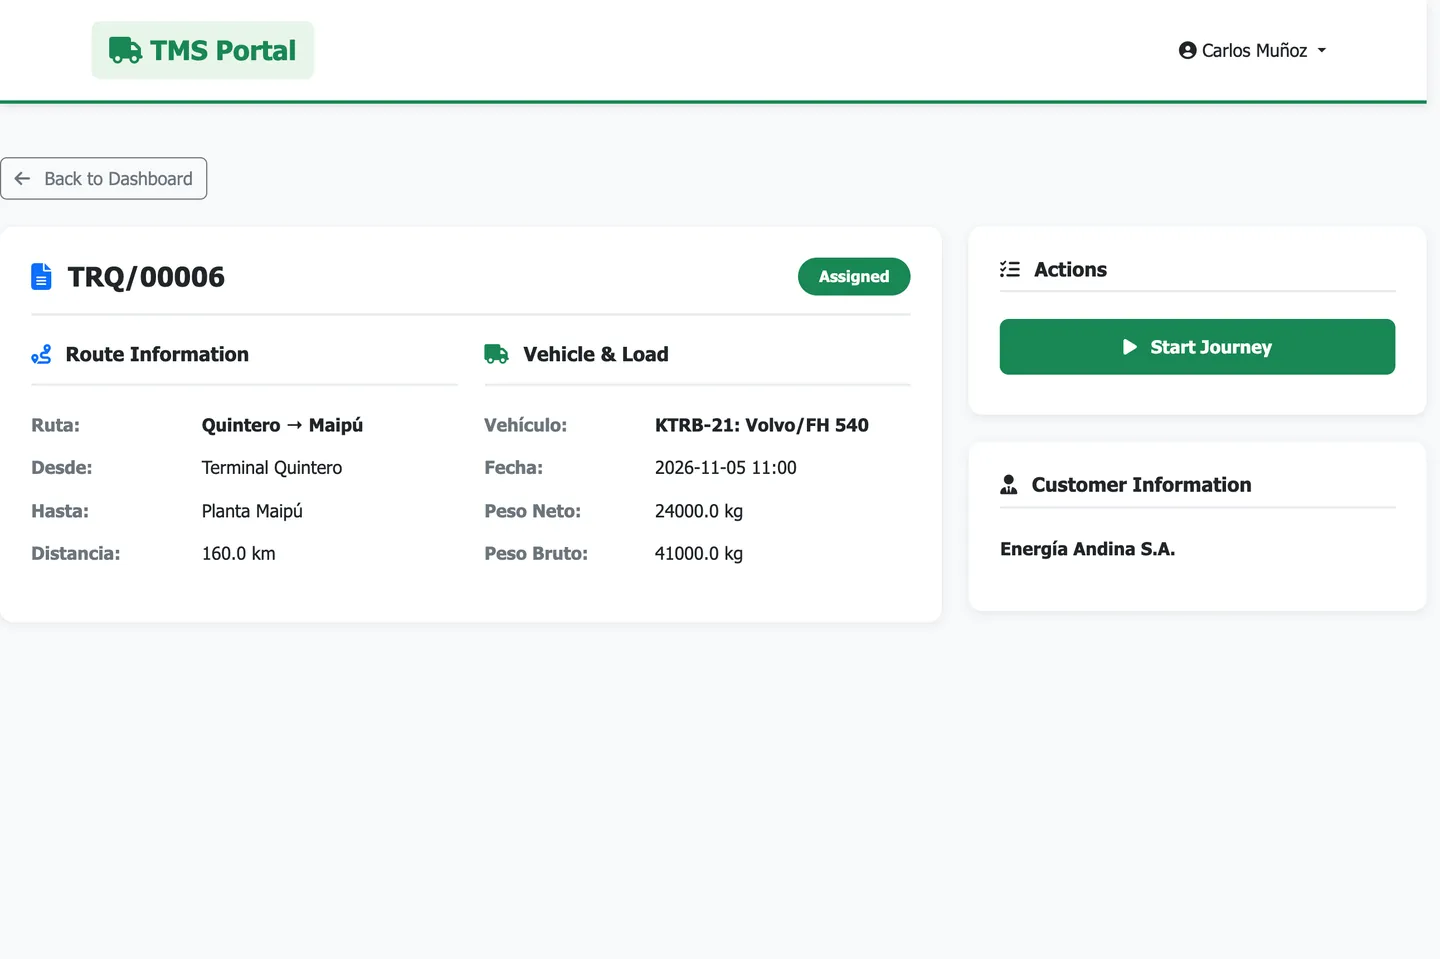
- 3On an assigned or programmed trip they click «Start Journey» (it moves to In progress) and, on arrival, «Complete Journey» (it moves to Done).
18 · Drivers
Payroll from trips
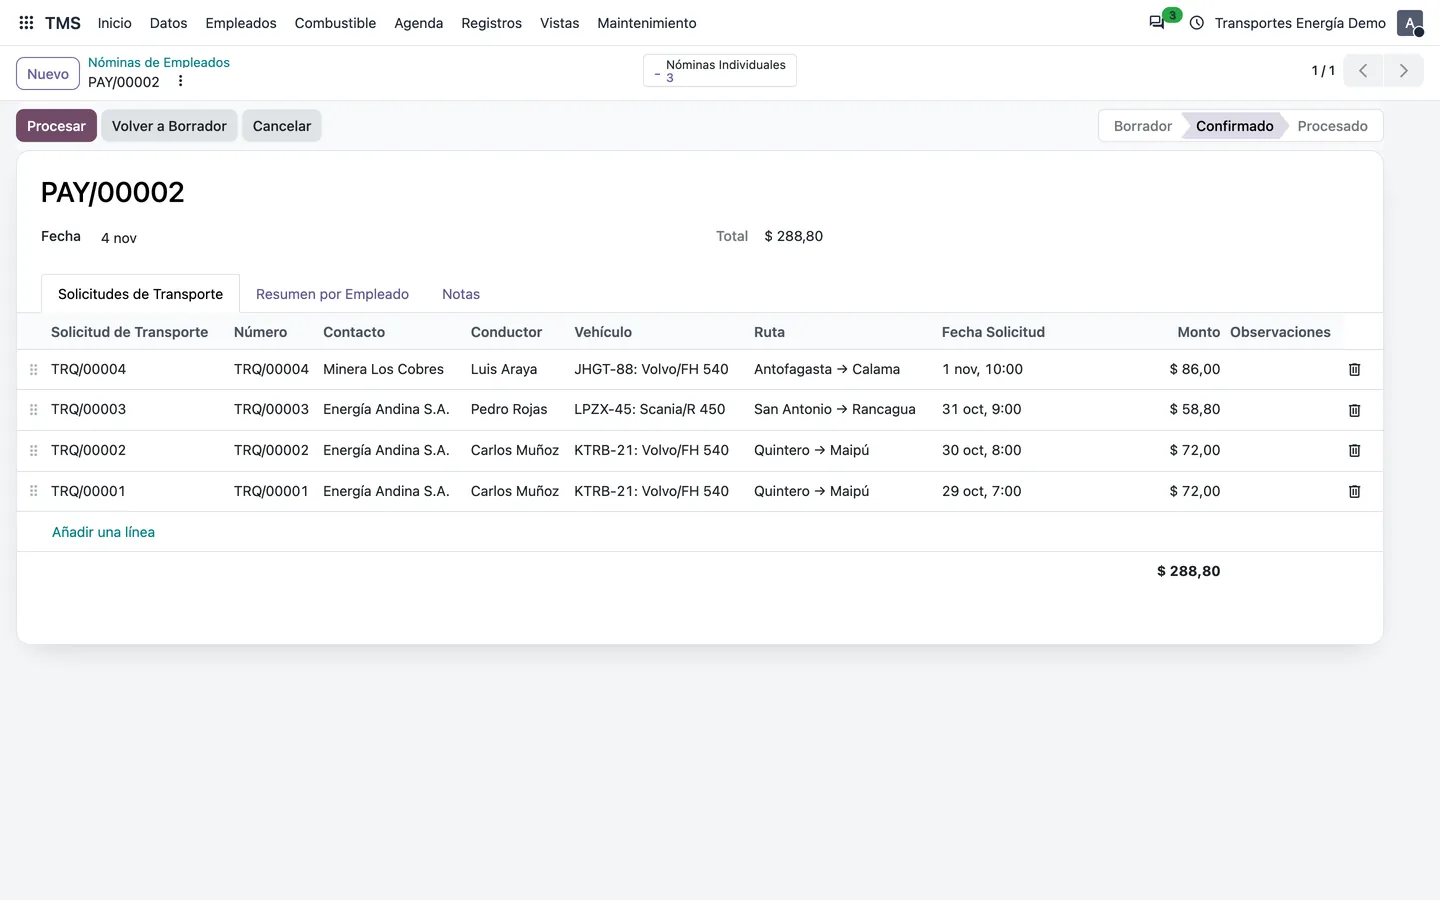
Payroll is computed from trips: each line is the request distance times the driver’s cost per kilometre. Confirming it creates a summary per driver and an individual payroll with the rules of their configuration.
- 1In the request list select the trips to pay and use the «Create payroll» action: choose the date and add notes.
- 2Check the lines (request, customer, driver, vehicle, route and amount) and click «Confirm»: the summary per driver (trips and total) and the individual payrolls are generated.
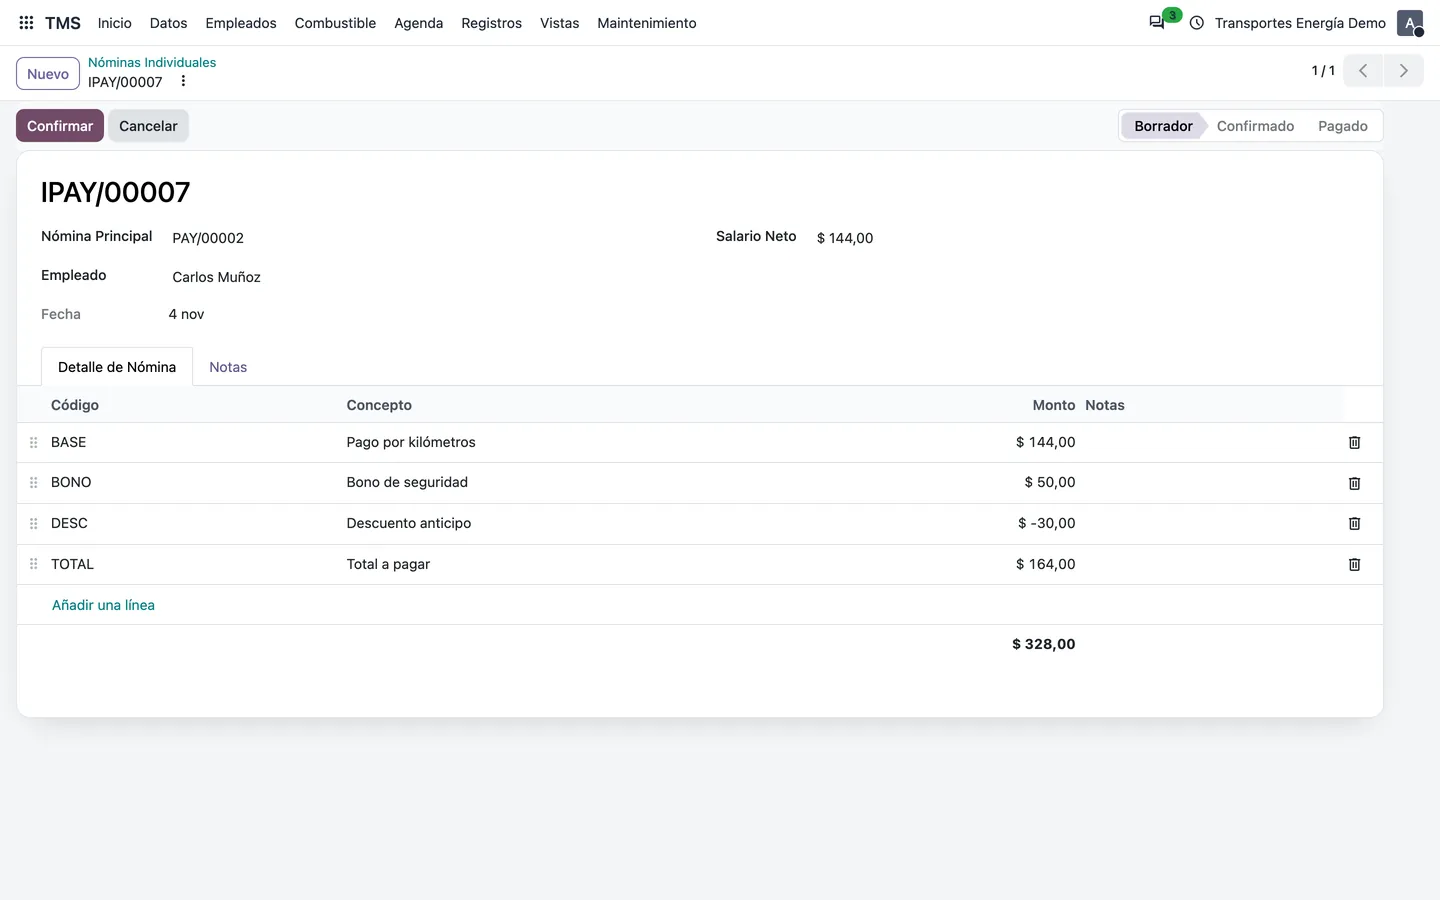
- 3Each individual payroll applies the salary rules of the driver’s configuration; confirm it, mark it as paid and print it as a PDF.
- 4Mark the main payroll as processed when you are done.
19 · Drivers
Payroll configurator
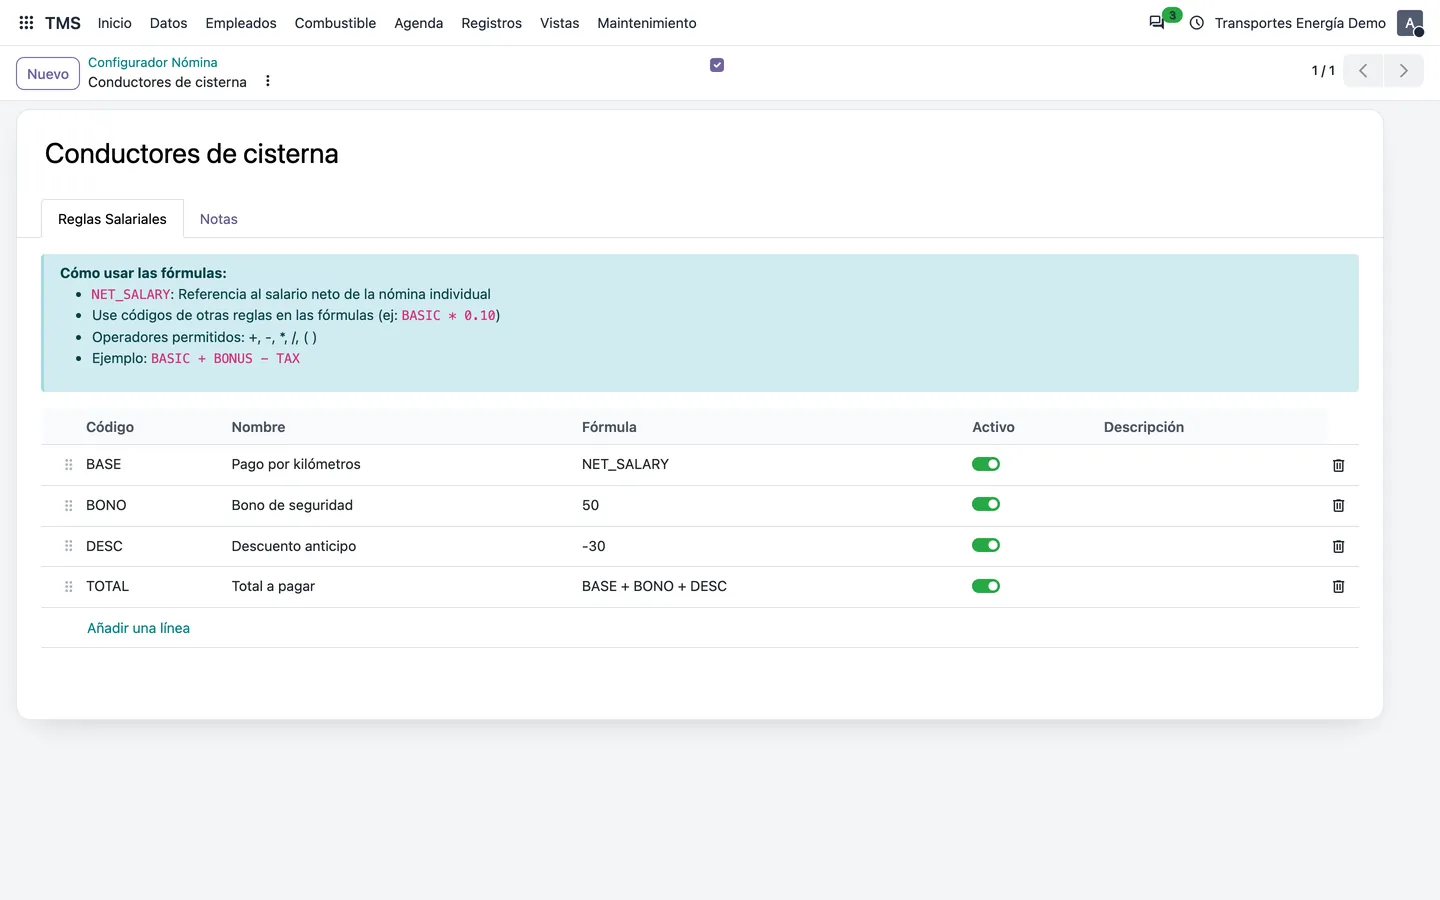
A configuration is a set of salary rules, each with a code and a formula. They are applied in order and each rule can use the result of the previous ones.
- 1Go to TMS → Employees → Payroll configurator and create a configuration.
- 2Add rules with sequence, code, name and formula. In the formula use NET_SALARY (the amount of the driver’s trips), numbers, the codes of previous rules and the + − * / operators and parentheses.
- 3Example: BASE = NET_SALARY · BONUS = 50 · DEDUCT = -30 · TOTAL = BASE + BONUS + DEDUCT.
- 4Assign the configuration to each driver on their employee record.
Tip: Rule codes must be unique within each configuration. If a formula has an error, confirming the payroll tells you which rule and why.